Page copy protected against web site content infringement by Copyscape

Tuesday, 2 March 2010

Toooooooooo LATE !!! For my Tiramissu ;))

February daring bakers challenge is about "Tiramissu"....This kind of italian dessert that we all love it !!
The February 2010 Daring Bakers’ challenge was hosted by Aparna of My Diverse Kitchen and Deeba of Passionate About Baking. They chose Tiramisu as the challenge for the month. Their challenge recipe is based on recipes from The Washington Post, Cordon Bleu at Home and Baking Obsession.
I really feel so sorry , this month was not easy at all ....a lot of things happenend, I could not find the time to make my challenge on time, but here I am trying to catch it at the last moment, hope that is not too late ;))
This month is all about coffee, at least for me simply because I do not "eat coffee"neither drink it but in tiramissu.
I made Savoiardi biscuits "I am used to make it from scratch" simply because the ready made one is not available ;)
Here you are the pic.
Also I am used to prepare "Mascarpone" for the same reason !!
Here you are the pic.
I served it with mountain honey and pistachio.
I was used to serve Tiramisu in circle shape or a heart shape surrounded with savoiardi biscuits but this time I tried something different, I made coffee cups from chocolate, I made three cups one in white chocolate, the other in black chocolate, the third in coloured chocolate, I gave it the moka color, I used transfer chocolate sheets to decorate it, Here you are some of the pics, I also served one tiramisu traditionally but I added a heart of grinded rose macaron, hope you like it all.


Here you are the recipes for all of these goodies ;)
TIRAMISU
(Recipe source: Carminantonio's Tiramisu from
The Washington Post, July 11 2007 )This recipe makes 6 servings
Ingredients:For the zabaglione:2 large egg yolks3 tablespoons sugar/50gms1/4 cup/60ml Marsala wine (or port or coffee)1/4 teaspoon/ 1.25ml vanilla extract1/2 teaspoon finely grated lemon zest
For the vanilla pastry cream:1/4 cup/55gms sugar1 tablespoon/8gms all purpose flour1/2 teaspoon finely grated lemon zest1/2 teaspoon/ 2.5ml vanilla extract1 large egg yolk3/4 cup/175ml whole milk
For the whipped cream:1 cup/235ml chilled heavy cream (we used 25%)1/4 cup/55gms sugar1/2 teaspoon/ 2.5ml vanilla extract
To assemble the tiramisu:2 cups/470ml brewed espresso, warmed1 teaspoon/5ml rum extract (optional)1/2 cup/110gms sugar1/3 cup/75gms mascarpone cheese36 savoiardi/ ladyfinger biscuits (you may use less)2 tablespoons/30gms unsweetened cocoa powder
Method:For the zabaglione: Heat water in a double boiler. If you don’t have a double boiler, place a pot with about an inch of water in it on the stove. Place a heat-proof bowl in the pot making sure the bottom does not touch the water.In a large mixing bowl (or stainless steel mixing bowl), mix together the egg yolks, sugar, the Marsala (or espresso/ coffee), vanilla extract and lemon zest. Whisk together until the yolks are fully blended and the mixture looks smooth.Transfer the mixture to the top of a double boiler or place your bowl over the pan/ pot with simmering water. Cook the egg mixture over low heat, stirring constantly, for about 8 minutes or until it resembles thick custard. It may bubble a bit as it reaches that consistency.Let cool to room temperature and transfer the zabaglione to a bowl. Cover and refrigerate at least 4 hours or overnight, until thoroughly chilled.
For the pastry cream: Mix together the sugar, flour, lemon zest and vanilla extract in a medium heavy-bottomed saucepan. To this add the egg yolk and half the milk. Whisk until smooth.Now place the saucepan over low heat and cook, stirring constantly to prevent the mixture from curdling.Add the remaining milk a little at a time, still stirring constantly. After about 12 minutes the mixture will be thick, free of lumps and beginning to bubble. (If you have a few lumps, don’t worry. You can push the cream through a fine-mesh strainer.)Transfer the pastry cream to a bowl and cool to room temperature. Cover with plastic film and refrigerate at least 4 hours or overnight, until thoroughly chilled.
For the whipped cream:Combine the cream, sugar and vanilla extract in a mixing bowl. Beat with an electric hand mixer or immersion blender until the mixture holds stiff peaks. Set aside.
To assemble the tiramisu: Have ready a rectangular serving dish (about 8" by 8" should do) or one of your choice.Mix together the warm espresso, rum extract and sugar in a shallow dish, whisking to mix well. Set aside to cool.In a large bowl, beat the mascarpone cheese with a spoon to break down the lumps and make it smooth. This will make it easier to fold. Add the prepared and chilled zabaglione and pastry cream, blending until just combined. Gently fold in the whipped cream. Set this cream mixture aside.
Now to start assembling the tiramisu.Workings quickly, dip 12 of the ladyfingers in the sweetened espresso, about 1 second per side. They should be moist but not soggy. Immediately transfer each ladyfinger to the platter, placing them side by side in a single row. You may break a lady finger into two, if necessary, to ensure the base of your dish is completely covered.Spoon one-third of the cream mixture on top of the ladyfingers, then use a rubber spatula or spreading knife to cover the top evenly, all the way to the edges.Repeat to create 2 more layers, using 12 ladyfingers and the cream mixture for each layer. Clean any spilled cream mixture; cover carefully with plastic wrap and refrigerate the tiramisu overnight.To serve, carefully remove the plastic wrap and sprinkle the tiramisu with cocoa powder using a fine-mesh strainer or decorate as you please. Cut into individual portions and serve.
MASCARPONE CHEESE
(Source: Vera’s Recipe for
Homemade Mascarpone Cheese)This recipe makes 12oz/ 340gm of mascarpone cheese
Ingredients:474ml (approx. 500ml)/ 2 cups whipping (36 %) pasteurized (not ultra-pasteurized), preferably organic cream (between 25% to 36% cream will do)1 tablespoon fresh lemon juice
Method:
Bring 1 inch of water to a boil in a wide skillet. Reduce the heat to medium-low so the water is barely simmering. Pour the cream into a medium heat-resistant bowl, then place the bowl into the skillet. Heat the cream, stirring often, to 190 F. If you do not have a thermometer, wait until small bubbles keep trying to push up to the surface.It will take about 15 minutes of delicate heating. Add the lemon juice and continue heating the mixture, stirring gently, until the cream curdles. Do not expect the same action as you see during ricotta cheese making. All that the whipping cream will do is become thicker, like a well-done crème anglaise. It will cover a back of your wooden spoon thickly. You will see just a few clear whey streaks when you stir. Remove the bowl from the water and let cool for about 20 minutes. Meanwhile, line a sieve with four layers of dampened cheesecloth and set it over a bowl. Transfer the mixture into the lined sieve. Do not squeeze the cheese in the cheesecloth or press on its surface (be patient, it will firm up after refrigeration time). Once cooled completely, cover with plastic wrap and refrigerate (in the sieve) overnight or up to 24 hours.Vera’s notes: The first time I made mascarpone I had all doubts if it’d been cooked enough, because of its custard-like texture. Have no fear, it will firm up beautifully in the fridge, and will yet remain lusciously creamy.Keep refrigerated and use within 3 to 4 days.
LADYFINGERS/ SAVOIARDI BISCUITS(Source: Recipe from
Cordon Bleu At Home)This recipe makes approximately 24 big ladyfingers or 45 small (2 1/2" to 3" long) ladyfingers.
Ingredients:3 eggs, separated6 tablespoons /75gms granulated sugar3/4 cup/95gms cake flour, sifted (or 3/4 cup all purpose flour + 2 tbsp corn starch)6 tablespoons /50gms confectioner's sugar,
Method:
Preheat your oven to 350 F (175 C) degrees, then lightly brush 2 baking sheets with oil or softened butter and line with parchment paper.Beat the egg whites using a hand held electric mixer until stiff peaks form. Gradually add granulate sugar and continue beating until the egg whites become stiff again, glossy and smooth.In a small bowl, beat the egg yolks lightly with a fork and fold them into the meringue, using a wooden spoon. Sift the flour over this mixture and fold gently until just mixed. It is important to fold very gently and not overdo the folding. Otherwise the batter would deflate and lose volume resulting in ladyfingers which are flat and not spongy.Fit a pastry bag with a plain tip (or just snip the end off; you could also use a Ziploc bag) and fill with the batter. Pipe the batter into 5" long and 3/4" wide strips leaving about 1" space in between the strips.Sprinkle half the confectioner's sugar over the ladyfingers and wait for 5 minutes. The sugar will pearl or look wet and glisten. Now sprinkle the remaining sugar. This helps to give the ladyfingers their characteristic crispness.Hold the parchment paper in place with your thumb and lift one side of the baking sheet and gently tap it on the work surface to remove excess sprinkled sugar.Bake the ladyfingers for 10 minutes, then rotate the sheets and bake for another 5 minutes or so until the puff up, turn lightly golden brown and are still soft.Allow them to cool slightly on the sheets for about 5 minutes and then remove the ladyfingers from the baking sheet with a metal spatula while still hot, and cool on a rack.Store them in an airtight container till required. They should keep for 2 to 3 weeks.
I am going now to check March challenge....see you all :)))

Friday, 29 January 2010

Nah-nye-Moh, a new daring baker challenge !!

This month , Canada is our subject, we are going to make Nanaimo ??? what?? who??
That is what"daring bakers" do ;)))
Every month we try something new and that is the most enjoyable part for me.
Nanaimo Bars are a classic Canadian dessert created in none other than Nanaimo, British Colombia. In case you were wondering, it’s pronounced Nah-nye-Moh. These bars have 3 layers: a base containing graham crackers, cocoa, coconut and nuts, a middle custard layer, and a topping of chocolate. They are extremely rich and available almost everywhere across the country.
Canada will host the 2010 Winter Olympics, it will be held in Vancouver .
The January 2010 Daring Bakers’ challenge was hosted by Lauren of Celiac Teen. Lauren chose Gluten-Free Graham Wafers and Nanaimo Bars as the challenge for the month. The sources she based her recipe on are 101 Cookbooks and www.nanaimo.ca.
For me as I am living in Egypt and really sorry to say that all the food products suitable for Celiac people are not available, so I knew from the first moment that I should go for the plain flour graham crackers, so I used the Graham crackers recipe in this lovely site

And I started to make the recipe, it was nice but a little bit heavy for us.
I noticed that a lot of american and canadian desserts are really heavy, a lot of butter and a lot of sugar, but we enjoyed it and we enjoyed Graham crackers a lot.
Here you are the recipe, the gluten free one :-
For Gluten-Free Graham WafersIngredients1 cup (138 g) (4.9 ounces) Sweet rice flour (also known as glutinous rice flour)3/4 cup (100 g) (3.5 ounces) Tapioca Starch/Flour1/2 cup (65 g) (2.3 ounces) Sorghum Flour1 cup (200 g) (7.1 ounces) Dark Brown Sugar, Lightly packed1 teaspoon (5 mL) Baking soda3/4 teaspoon (4 mL ) Kosher Salt7 tablespoons (100 g) (3 ½ ounces) Unsalted Butter (Cut into 1-inch cubes and frozen)1/3 cup (80 mL) Honey, Mild-flavoured such as clover.5 tablespoons (75 mL) Whole Milk2 tablespoons (30 mL) Pure Vanilla Extract
Directions:1. In the bowl of a food processor fitted with a steel blade, combine the flours, brown sugar, baking soda, and salt. Pulse on low to incorporate. Add the butter and pulse on and off, until the mixture is the consistency of a coarse meal. If making by hand, combine aforementioned dry ingredients with a whisk, then cut in butter until you have a coarse meal. No chunks of butter should be visible.2. In a small bowl or liquid measuring cup, whisk together the honey, milk and vanilla. Add to the flour mixture until the dough barely comes together. It will be very soft and sticky.3. Turn the dough onto a surface well-floured with sweet rice flour and pat the dough into a rectangle about 1 inch thick. Wrap in plastic and chill until firm, about 2 hours, or overnight.4. Divide the dough in half and return one half to the refrigerator. Sift an even layer of sweet rice flour onto the work surface and roll the dough into a long rectangle, about 1/8 inch thick. The dough will be quite sticky, so flour as necessary. Cut into 4 by 4 inch squares. Gather the scraps together and set aside. Place wafers on one or two parchment-lined baking sheets. Chill until firm, about 30 to 45 minutes. Repeat with the second batch of dough.5. Adjust the rack to the upper and lower positions and preheat oven to 350 degrees Fahrenheit (180 degrees Celsius).6. Gather the scraps together into a ball, chill until firm, and reroll. Dust the surface with more sweet rice flour and roll out the dough to get a couple more wafers.7. Prick the wafers with toothpick or fork, not all the way through, in two or more rows.8. Bake for 25 minutes, until browned and slightly firm to the touch, rotating sheets halfway through to ensure even baking. Might take less, and the starting location of each sheet may determine its required time. The ones that started on the bottom browned faster.9. When cooled completely, place enough wafers in food processor to make 1 ¼ cups (300 mL) of crumbs. Another way to do this is to place in a large ziplock bag, force all air out and smash with a rolling pin until wafers are crumbs.
Nanaimo BarsIngredients:
For Nanaimo Bars — Bottom Layer1/2 cup (115 g) (4 ounces) Unsalted Butter1/4 cup (50 g) (1.8 ounces) Granulated Sugar5 tablespoons (75 mL) Unsweetened Cocoa1 Large Egg, Beaten1 1/4 cups (300 mL) (160 g) (5.6 ounces) Gluten Free Graham Wafer Crumbs (See previous recipe)1/2 cup (55 g) (1.9 ounces) Almonds (Any type, Finely chopped)1 cup (130 g) (4.5 ounces) Coconut (Shredded, sweetened or unsweetened)
For Nanaimo Bars — Middle Layer1/2 cup (115 g) (4 ounces) Unsalted Butter2 tablespoons and 2 teaspoons (40 mL) Heavy Cream2 tablespoons (30 mL) Vanilla Custard Powder (Such as Bird’s. Vanilla pudding mix may be substituted.)2 cups (254 g) (8.9 ounces) Icing Sugar
For Nanaimo Bars — Top Layer4 ounces (115 g) Semi-sweet chocolate2 tablespoons (28 g) (1 ounce) Unsalted Butter
Directions:1. For bottom Layer: Melt unsalted butter, sugar and cocoa in top of a double boiler. Add egg and stir to cook and thicken. Remove from heat. Stir in crumbs, nuts and coconut. Press firmly into an ungreased 8 by 8 inch pan.2. For Middle Layer: Cream butter, cream, custard powder, and icing sugar together well. Beat until light in colour. Spread over bottom layer.3. For Top Layer: Melt chocolate and unsalted butter over low heat. Cool. Once cool, pour over middle layer and chill.
-------------------------------

I really loved to change in the shape, and I added some strawberry puree and kimkawat jam between the custard layer and the bottom layer, I used some chocolate transfer tooAnd see what I also did???

I invited the three mascots of the vancouver winter olympics to share with us the sweet bars
Quatchi
Sumi
Miga
We really enjoyed our time together ;)))

Thanks dear Lauren for the wonderful challenge :))

Monday, 25 January 2010

Peter Reinhart's new book !!

I've been honored to be one of the testers who worked with the great man Peter Reinhart, he was kind enough to write our names in his book, that really makes me so happy, and of course the book is really awesome, for those who did not buy it i really recommend it, it is a great book as great as his " bread baker apprentice". I made all the recipes and they really became my favorites.
Today I would like to show my latest bakes, it was a present to my old french teacher, she was and still the most wonderful teacher I ever met.
I made for her Brioche "the middle class one " from BBA and also cassatiello, I made also some cinnamon rolls but I used my own recipe, you'll find here on the blog.


Would like to share with you some of the pics ;))


My next post will be about our daring bakers' challenge, wait for me ;)))

Monday, 18 January 2010

I'll be back !!

I'll be back !!
I really missed you all and missed my blog ;))
Back home, sweet home ;))
Chahira Daoud

Tuesday, 27 October 2009

Macarons !! For and from the first time ;)))


It was my first time to try macaron and even taste it, after all the stories on DB site, I thought for a while that I'll not be able to do it, we do not have almond's powder in Egypt so I tried hardly to make some and I was very care not to turn it into almond paste, this batch was my fisrt one and between me and myself i said that if i couldn't make it at the first time I would not make it again simply becaue I had not enough time to age the egg white and to make some almond powder one more time.


Thanks God, it turned out good from the first try except some cracks in some macarons and that was because of my wild over heat gaz oven, anyway the result for me was satisfied, I got "feet" :)))))
I used mastic as a flavor I grinded it with the sugar, I filled my macrons with pistachio paste, I made it by mixing grinded pistachio plus a little bit of honey and I flavored it with orange blossom water.

We realy loved macrons and I am sure I'll make it a lot.
Here you are some of my macarons pics


The 2009 October Daring Bakers’ challenge was brought to us by Ami S. She chose macarons from Claudia Fleming’s The Last Course: The Desserts of Gramercy Tavern as the challenge recipe.


Preparation time: Not taking into account the amount of time it takes for you to bring your egg whites to room temperature, the whole baking process, including making the batter, piping and baking will probably take you about an hour to an hour and a half. How long it takes to make your filling is dependent on what you choose to make.
Actual baking time: 12 minutes total, plus a few minutes to get your oven from 200°F to 375°F.
Equipment required:• Electric mixer, preferably a stand mixer with a whisk attachment• Rubber spatula• Baking sheets• Parchment paper or nonstick liners• Pastry bag (can be disposable)• Plain half-inch pastry bag tip• Sifter or sieve• If you don’t have a pastry bag and/or tips, you can use a Ziploc bag with the corner snipped off• Oven• Cooling rack• Thin-bladed spatula for removing the macaroons from the baking sheets• Food processor or nut grinder, if grinding your own nuts (ouch!)
IngredientsConfectioners’ (Icing) sugar: 2 ¼ cups (225 g, 8 oz.)Almond flour: 2 cups (190 g, 6.7 oz.)Granulated sugar: 2 tablespoons (25 g , .88 oz.)Egg whites: 5 (Have at room temperature)
Directions:
1. Preheat the oven to 200°F (93°C). Combine the confectioners’ sugar and almond flour in a medium bowl. If grinding your own nuts, combine nuts and a cup of confectioners’ sugar in the bowl of a food processor and grind until nuts are very fine and powdery.2. Beat the egg whites in the clean dry bowl of a stand mixer until they hold soft peaks. Slowly add the granulated sugar and beat until the mixture holds stiff peaks.3. Sift a third of the almond flour mixture into the meringue and fold gently to combine. If you are planning on adding zest or other flavorings to the batter, now is the time. Sift in the remaining almond flour in two batches. Be gentle! Don’t overfold, but fully incorporate your ingredients.4. Spoon the mixture into a pastry bag fitted with a plain half-inch tip (Ateco #806). You can also use a Ziploc bag with a corner cut off. It’s easiest to fill your bag if you stand it up in a tall glass and fold the top down before spooning in the batter.5. Pipe one-inch-sized (2.5 cm) mounds of batter onto baking sheets lined with nonstick liners (or parchment paper).6. Bake the macaroon for 5 minutes. Remove the pan from the oven and raise the temperature to 375°F (190°C). Once the oven is up to temperature, put the pans back in the oven and bake for an additional 7 to 8 minutes, or lightly colored.7. Cool on a rack before filling.
Yield: 10 dozen.

Thanks Ami for this lovely challenge !!

Special thanks to Audax and to Tartelette, their instructions were really so useful for all of us !!

And Waiting for November challenge ;))

Wednesday, 30 September 2009

Vol-au-vents, our daring bakers challenge for september !!

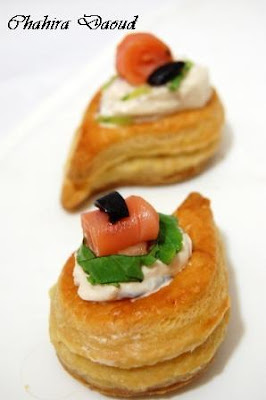
I found that I'll be so busy this month so I decided to make the challenge earlier this month.I love puff pastry and all the laminated dough, so I really enjoyed this month challenge.Here you are some of the pics, I made a variety, savoury and sweet.


The September 2009 Daring Bakers' challenge was hosted by Steph of A Whisk and a Spoon. She chose the French treat, Vols-au-Vent based on the Puff Pastry recipe by Michel Richard from the cookbook Baking With Julia by Dorie Greenspan.
Puff pastry (aka pâte feuilletée) is something most of us usually buy at the grocery store, but in order to be really daring, we should make our own at least once in awhile, right? Kitchens should be getting cooler in the northern hemisphere, and are hopefully still cool-ish in the sourthern hempisphere, so I’m hoping you will all join me in making homemade puff pastry from Michel Richard’s recipe, as it appears in the book Baking with Julia by Dorie Greenspan. With our homemade puff we’ll be forming vols-au-vent cases to fill with anything we chose.
Puff pastry is in the ‘laminated dough” family, along with Danish dough and croissant dough. (In fact, if you participated in the Danish Braid challenge back in June 2008, then you already know the general procedure for working with laminated dough.) A laminated dough consists of a large block of butter (called the “beurrage”) that is enclosed in dough (called the “détrempe”). This dough/butter packet is called a “paton,” and is rolled and folded repeatedly (a process known as “turning”) to create the crisp, flaky, parallel layers you see when baked. Unlike Danish or croissant however, puff pastry dough contains no yeast in the détrempe, and relies solely aeration to achieve its high rise. The turning process creates hundreds of layers of butter and dough, with air trapped between each one. In the hot oven, water in the dough and the melting butter creates steam, which expands in the trapped air pockets, forcing the pastry to rise.
Once we have our puff pastry dough made and chilled, we are going to roll and form a portion of it into vols-au-vent, which are little puff pastry cases designed to hold a filling. I chose vols-au-vent specifically because I think they do a beautiful job of showing off the hundreds of flaky layers in the homemade puff. They can be made large enough for a full meal, or made small for little one-bite canapés, the choice is yours. Vols-au-vent are typically served hot and filled with a creamy savory filling (often poultry or seafood-based), but cold fillings, such as chicken or tuna salad, work, too. Whipped cream or pastry cream with fresh or stewed fruit often goes into sweet versions.Mandatory parts of the challenge: You must make Michel Richard’s recipe for puff pastry (as seen below), and form at least part of it into vols-au-vent (instructions below).
Optional parts of the challenge: You may make your vols-au-vent large or small, and may fill them with whatever you choose (savory or sweet).
Equipment:-food processor (will make mixing dough easy, but I imagine this can be done by hand as well)-rolling pin-pastry brush-metal bench scraper (optional, but recommended)-plastic wrap-baking sheet-parchment paper-silicone baking mat (optional, but recommended)-set of round cutters (optional, but recommended)-sharp chef’s knife-fork-oven-cooling rack
Prep Times:-about 4-5 hours to prepare the puff pastry dough (much of this time is inactive, while you wait for the dough to chill between turns…it can be stretched out over an even longer period of time if that better suits your schedule)-about 1.5 hours to shape, chill and bake the vols-au-vent after your puff pastry dough is complete
Forming and Baking the Vols-au-Vent
Yield: 1/3 of the puff pastry recipe below will yield about 8-10 1.5” vols-au-vent or 4 4” vols-au-vent
In addition to the equipment listed above, you will need:-well-chilled puff pastry dough (recipe below)-egg wash (1 egg or yolk beaten with a small amount of water)-your filling of choice
Line a baking sheet with parchment and set aside.
Using a knife or metal bench scraper, divided your chilled puff pastry dough into three equal pieces. Work with one piece of the dough, and leave the rest wrapped and chilled. (If you are looking to make more vols-au-vent than the yield stated above, you can roll and cut the remaining two pieces of dough as well…if not, then leave refrigerated for the time being or prepare it for longer-term freezer storage. See the “Tips” section below for more storage info.)
On a lightly floured surface, roll the piece of dough into a rectangle about 1/8 to 1/4-inch (3-6 mm) thick. Transfer it to the baking sheet and refrigerate for about 10 minutes before proceeding with the cutting.
(This assumes you will be using round cutters, but if you do not have them, it is possible to cut square vols-au-vents using a sharp chef’s knife.) For smaller, hors d'oeuvre sized vols-au-vent, use a 1.5” round cutter to cut out 8-10 circles. For larger sized vols-au-vent, fit for a main course or dessert, use a 4” cutter to cut out about 4 circles. Make clean, sharp cuts and try not to twist your cutters back and forth or drag your knife through the dough. Half of these rounds will be for the bases, and the other half will be for the sides. (Save any scrap by stacking—not wadding up—the pieces…they can be re-rolled and used if you need extra dough. If you do need to re-roll scrap to get enough disks, be sure to use any rounds cut from it for the bases, not the ring-shaped sides.)
Using a ¾-inch cutter for small vols-au-vent, or a 2- to 2.5-inch round cutter for large, cut centers from half of the rounds to make rings. These rings will become the sides of the vols-au-vent, while the solid disks will be the bottoms. You can either save the center cut-outs to bake off as little “caps” for you vols-au-vent, or put them in the scrap pile.

Dock the solid bottom rounds with a fork (prick them lightly, making sure not to go all the way through the pastry) and lightly brush them with egg wash. Place the rings directly on top of the bottom rounds and very lightly press them to adhere. Brush the top rings lightly with egg wash, trying not to drip any down the sides (which may inhibit rise). If you are using the little “caps,” dock and egg wash them as well.

Refrigerate the assembled vols-au-vent on the lined baking sheet while you pre-heat the oven to 400ºF (200ºC). (You could also cover and refrigerate them for a few hours at this point.)
Once the oven is heated, remove the sheet from the refrigerator and place a silicon baking mat (preferred because of its weight) or another sheet of parchment over top of the shells. This will help them rise evenly. Bake the shells until they have risen and begin to brown, about 10-15 minutes depending on their size. Reduce the oven temperature to 350ºF (180ºC), and remove the silicon mat or parchment sheet from the top of the vols-au-vent. If the centers have risen up inside the vols-au-vent, you can gently press them down. Continue baking (with no sheet on top) until the layers are golden, about 15-20 minutes more. (If you are baking the center “caps” they will likely be finished well ahead of the shells, so keep an eye on them and remove them from the oven when browned.)
Remove to a rack to cool. Cool to room temperature for cold fillings or to warm for hot fillings.
Fill and serve.
*For additional rise on the larger-sized vols-au-vents, you can stack one or two additional ring layers on top of each other (using egg wash to "glue"). This will give higher sides to larger vols-au-vents, but is not advisable for the smaller ones, whose bases may not be large enough to support the extra weight.
*Although they are at their best filled and eaten soon after baking, baked vols-au-vent shells can be stored airtight for a day.
*Shaped, unbaked vols-au-vent can be wrapped and frozen for up to a month (bake from frozen, egg-washing them first).
Michel Richard’s Puff Pastry Dough
From: Baking with Julia by Dorie GreenspanYield: 2-1/2 pounds doughSteph’s note: This recipe makes more than you will need for the quantity of vols-au-vent stated above. While I encourage you to make the full recipe of puff pastry, as extra dough freezes well, you can halve it successfully if you’d rather not have much leftover.
There is a wonderful on-line video from the PBS show “Baking with Julia” that accompanies the book. In it, Michel Richard and Julia Child demonstrate making puff pastry dough (although they go on to use it in other applications). They do seem to give slightly different ingredient measurements verbally than the ones in the book…I listed the recipe as it appears printed in the book.
http://video.pbs.org/video/1174110297/search/Pastry
Ingredients:2-1/2 cups (12.2 oz/ 354 g) unbleached all-purpose flour1-1/4 cups (5.0 oz/ 142 g) cake flour1 tbsp. salt (you can cut this by half for a less salty dough or for sweet preparations)1-1/4 cups (10 fl oz/ 300 ml) ice water1 pound (16 oz/ 454 g) very cold unsalted butter
plus extra flour for dusting work surface
Mixing the Dough:
Check the capacity of your food processor before you start. If it cannot hold the full quantity of ingredients, make the dough into two batches and combine them.
Put the all-purpose flour, cake flour, and salt in the work bowl of a food processor fitted with a metal blade and pulse a couple of times just to mix. Add the water all at once, pulsing until the dough forms a ball on the blade. The dough will be very moist and pliable and will hold together when squeezed between your fingers. (Actually, it will feel like Play-Doh.)
Remove the dough from the machine, form it into a ball, with a small sharp knife, slash the top in a tic-tac-toe pattern. Wrap the dough in a damp towel and refrigerate for about 5 minutes.
Meanwhile, place the butter between 2 sheets of plastic wrap and beat it with a rolling pin until it flattens into a square that's about 1" thick. Take care that the butter remains cool and firm: if it has softened or become oily, chill it before continuing.
Incorporating the Butter:
Unwrap the dough and place it on a work surface dusted with all-purpose flour (A cool piece of marble is the ideal surface for puff pastry) with your rolling pin (preferably a French rolling pin without handles), press on the dough to flatten it and then roll it into a 10" square. Keep the top and bottom of the dough well floured to prevent sticking and lift the dough and move it around frequently. Starting from the center of the square, roll out over each corner to create a thick center pad with "ears," or flaps.
Place the cold butter in the middle of the dough and fold the ears over the butter, stretching them as needed so that they overlap slightly and encase the butter completely. (If you have to stretch the dough, stretch it from all over; don't just pull the ends) you should now have a package that is 8" square.
To make great puff pastry, it is important to keep the dough cold at all times. There are specified times for chilling the dough, but if your room is warm, or you work slowly, or you find that for no particular reason the butter starts to ooze out of the pastry, cover the dough with plastic wrap and refrigerate it . You can stop at any point in the process and continue at your convenience or when the dough is properly chilled.
Making the Turns:
Gently but firmly press the rolling pin against the top and bottom edges of the square (this will help keep it square). Then, keeping the work surface and the top of the dough well floured to prevent sticking, roll the dough into a rectangle that is three times as long as the square you started with, about 24" (don't worry about the width of the rectangle: if you get the 24", everything else will work itself out.) With this first roll, it is particularly important that the butter be rolled evenly along the length and width of the rectangle; check when you start rolling that the butter is moving along well, and roll a bit harder or more evenly, if necessary, to get a smooth, even dough-butter sandwich (use your arm-strength!).
With a pastry brush, brush off the excess flour from the top of the dough, and fold the rectangle up from the bottom and down from the top in thirds, like a business letter, brushing off the excess flour. You have completed one turn.
Rotate the dough so that the closed fold is to your left, like the spine of a book. Repeat the rolling and folding process, rolling the dough to a length of 24" and then folding it in thirds. This is the second turn.
Chilling the Dough:
If the dough is still cool and no butter is oozing out, you can give the dough another two turns now. If the condition of the dough is iffy, wrap it in plastic wrap and refrigerate it for at least 30 minutes. Each time you refrigerate the dough, mark the number of turns you've completed by indenting the dough with your fingertips. It is best to refrigerate the dough for 30 to 60 minutes between each set of two turns.
The total number of turns needed is six. If you prefer, you can give the dough just four turns now, chill it overnight, and do the last two turns the next day. Puff pastry is extremely flexible in this regard. However, no matter how you arrange your schedule, you should plan to chill the dough for at least an hour before cutting or shaping it.
Steph’s extra tips:
-While this is not included in the original recipe we are using (and I did not do this in my own trials), many puff pastry recipes use a teaspoon or two of white vinegar or lemon juice, added to the ice water, in the détrempe dough. This adds acidity, which relaxes the gluten in the dough by breaking down the proteins, making rolling easier. You are welcome to try this if you wish.
-Keep things cool by using the refrigerator as your friend! If you see any butter starting to leak through the dough during the turning process, rub a little flour on the exposed dough and chill straight away. Although you should certainly chill the dough for 30 to 60 minutes between each set of two turns, if you feel the dough getting to soft or hard to work with at any point, pop in the fridge for a rest.
-Not to sound contradictory, but if you chill your paton longer than the recommended time between turns, the butter can firm up too much. If this seems to be the case, I advise letting it sit at room temperature for 5-10 minutes to give it a chance to soften before proceeding to roll. You don't want the hard butter to separate into chuncks or break through the dough...you want it to roll evenly, in a continuous layer.
-Roll the puff pastry gently but firmly, and don’t roll your pin over the edges, which will prevent them from rising properly. Don't roll your puff thinner than about about 1/8 to 1/4-inch (3-6 mm) thick, or you will not get the rise you are looking for.
-Try to keep “neat” edges and corners during the rolling and turning process, so the layers are properly aligned. Give the edges of the paton a scooch with your rolling pin or a bench scraper to keep straight edges and 90-degree corners.
-Brush off excess flour before turning dough and after rolling.
-Make clean cuts. Don’t drag your knife through the puff or twist your cutters too much, which can inhibit rise.
-When egg washing puff pastry, try not to let extra egg wash drip down the cut edges, which can also inhibit rise.
-Extra puff pastry dough freezes beautifully. It’s best to roll it into a sheet about 1/8 to 1/4-inch thick (similar to store-bought puff) and freeze firm on a lined baking sheet. Then you can easily wrap the sheet in plastic, then foil (and if you have a sealable plastic bag big enough, place the wrapped dough inside) and return to the freezer for up to a few months. Defrost in the refrigerator when ready to use.
-You can also freeze well-wrapped, unbaked cut and shaped puff pastry (i.e., unbaked vols-au-vent shells). Bake from frozen, without thawing first.
-Homemade puff pastry is precious stuff, so save any clean scraps. Stack or overlap them, rather than balling them up, to help keep the integrity of the layers. Then give them a singe “turn” and gently re-roll. Scrap puff can be used for applications where a super-high rise is not necessary (such as palmiers, cheese straws, napoleons, or even the bottom bases for your vols-au-vent).

You can find lots more general tips for making puff pastry on-line, including here:http://www.baking911.com/pastry/puff.htm
I encourage everyone to watch the on-line video from the PBS show “Baking with Julia” that accompanies the book:
http://video.pbs.org/video/1174110297/search/Pastry

Friday, 4 September 2009

This month "walima" challenge is about "IRAQ" !!

Iraqi cuisine or Mesopotamian cuisine is Iraq's traditional cuisine developed since antiquity in MeMesopotamia (Sumer, Akkad, Babylonia, Assyria).
It is considered one of the oldest kitchens.
As Baghdad became the centre of the Abbasid Caliphate during the Islamic Golden Age, Muslims and other scholars from many parts of the world came to visit, live and study in Iraq, which gave the Iraqi cuisine new twists to its food.
This is most commonly seen in the greater use of spices (e.g. Saffron) used in the Iraqi cuisine in comparison to other Arab cuisines.
Iraqi cuisine has absorbed influences from all the neighboring countries and has much in common with Levantine, Persian, and Turkish cuisines.
With the Ottoman rule of Iraq, influences of Turkish cuisine also became incorporated into Iraqi recipes (and vice versa). Furthermore, as the rest of Iraqi history, the Iraqi cuisine has been deeply influenced by its fertile land between its two rivers Euphrates and Tigris.[1] This influence is seen in Iraq's national dishes.

the savoury dish is called Lissan Al Kadi - Eggplant wrapped Meat A literal translation: "Tongue of the Judge
"Makes about 20 pieces
Ingredients:
2 large eggplants ,
1/2 - 1 cup corn oil (if frying eggplant)

Stuffing: 2 lbs. Lean ground meat, 1 medium onion (1 cup) finely minced, 1 tsp salt,1/4 tsp black pepperSauce: 2 tbsp corn oil, 1 large onion diced, 1 large tomato sliced (optional), 1 large tomato peeled and chopped, 14 oz. tomato sauce, 1 cup beef or chicken stock, 1/2 cup lemon juice, 1 tsp salt,1/2 tsp pepper, 1 tsp turmeric.

Direction:Peel eggplant, trim off the top and bottom.
Stand eggplant up on cutting board and slice vertically, 1/8" thin. Sprinkle generously with salt, place in a strainer for about 1 hour.
Rinse off the salt and strain eggplant to dry.
Heat about 4 tbsp corn oil in a frying pan and fry the eggplant slices in batches, turning once to brown both sides. Be careful not to burn.
Add more oil as needed.
Drain cooked eggplant slices on paper towels.
Low fat alternative: Place eggplant slices on baking sheets lined with foil and brushed with corn oil.
Bake in the oven at 350 degrees for approximately 20-30 minutes until brown, turning the eggplant halfway.
Mix together the ground meat, onion, salt and pepper.
Divide the meat into sausage shaped portions 1" thick and 2" long.
Place a portion of the meat stuffing at one end of an eggplant slice and begin wrapping the eggplant around it. Place the rolls in a baking dish and layer the tomato slices on top (optional). In a saucepan heat 2 tbsp oil and saute the diced onions.

When soft add the chopped tomatoes, salt, pepper and turmeric.
Add tomato sauce, beef or chicken stock and lemon juice to taste.
Cover and simmer 15 minutes.

Pour the sauce over the rolls in the baking dish, cover with aluminum paper and bake for 1 hour (or until done) at 450 degrees.For dessert there was two options .

KURAT Al TAMIR - (Date Sesame Balls)


Ingredients:1 pound soft dates1 cup walnuts 1 cup toasted sesame seeds 2 tablespoons tahini ½ teaspoon cardamom/cinnamon or both

Preparation:Add dates, ½ cup sesame seeds, and tahini

in the food processor. Pulse and add the walnuts and spices; pulse again.

Take the mixture out and make small balls and roll them in toasted sesame or shredded coconuts.

Cardamom Cookies - Shakar Lama


Ingredients:

3 sticks butter 3 1/4 cup all purpose flour 3/4 cup sugar 1 egg yolk (optional) 1 tsp. ground cardamom 1/2tsp salt 1/3 cup slivered almonds

Preparation:
beat the butter in a bowl for 3 minutes.
Add sugar and beat the mixture until becomes light in color.
Add flour, cardamom and salt gradually.
Use your hand to mix the cookie dough.
Take a small piece of dough the size of walnut. Shape the cookie and place and almond in the middle. Arrange on a tray with parchment paper or siltpad. Bake for 20 minutes in 350 degree oven, Makes around 2 dozens .
Hope you enjoy our walima challenge this month.

Sunday, 30 August 2009

Dobos Torte for the first time !! August's DB' challenge !!

The August 2009 Daring Bakers' challenge was hosted by Angela of A Spoonfulof Sugar and Lorraine of Not Quite Nigella. They chose the spectacular DobosTorte based on a recipe from Rick Rodgers' cookbook Kaffeehaus: ExquisiteDesserts from the Classic Caffés of Vienna, Budapest, and Prague.


Actually I read about this kind of cake in one of my baking books, but I did not try it before and of course did not taste it before, so I said to myself why do not give it a try, it was not too dificult to make it, I just made 5 layers and I think it is enough because more cake layers means more butter cream layers, and in our home we do not like buttercream that much.

I made a dobos torte in the shape of heart, and the pic will show you how it turned out with me, I am too late this month but my camera felt down and I found myself " cameraless " for two weeks, you will not imagine how my life looks like without a camera, it ended by buying a new one, but I still have a lot of things to learn in this new one, may God help me, I hate Technology ;))

About the cake ???

I did not taste it yet :)))

I'll let you know about the taste ;))

For those who do not know about this torte

The Dobos Torta is a five-layer sponge cake, filled with a rich chocolate buttercream and topped with thin wedges of caramel. (You may come across recipes which have anywhere between six and 12 layers of cake; there are numerous family variations!) It was invented in 1885 by József C. Dobos, a Hungarian baker, and it rapidly became famous throughout Europe for both its extraordinary taste and its keeping properties. The recipe was a secret until Dobos retired in 1906 and gave the recipe to the Budapest Confectioners' and Gingerbread Makers' Chamber of Industry, providing that every member of the chamber can use it freely.

For the recipe :-

Equipment
2 baking sheets
9” (23cm) springform tin and 8” cake tin, for templates
mixing bowls (1 medium, 1 large)
a sieve
a double boiler (a large saucepan plus a large heat-proof mixing bowl which fits snugly over the top of the pan)
a small saucepan
a whisk (you could use a balloon whisk for the entire cake, but an electric hand whisk or stand mixer will make life much easier)
metal offset spatula
sharp knife
a 7 1/2” cardboard cake round, or just build cake on the base of a sprinfrom tin.
piping bag and tip, optional
Prep times
Sponge layers 20 mins prep, 40 mins cooking total if baking each layer individually.
Buttercream: 20 mins cooking. Cooling time for buttercream: about 1 hour plus 10 minutes after this to beat and divide.
Caramel layer: 10-15 minutes.
Assembly of whole cake: 20 minutes
Sponge cake layers
6 large eggs, separated, at room temperature
1 1/3 cups (162g) confectioner's (icing) sugar, divided
1 teaspoon (5ml) vanilla extract
1 cup plus 2 tablespoons (112g) sifted cake flour (SUBSTITUTE 95g plain flour + 17g cornflour (cornstarch) sifted together)
pinch of salt
Chocolate Buttercream
4 large eggs, at room temperature
1 cup (200g) caster (ultrafine or superfine white) sugar
4oz (110g) bakers chocolate or your favourite dark chocolate, finely chopped
2 sticks plus 2 tablespoons (250g) unsalted butter, at room temperature.
Caramel topping
1 cup (200g) caster (superfine or ultrafine white) sugar
12 tablespoons (180 ml) water
8 teaspoons (40 ml) lemon juice
1 tablespoon neutral oil (e.g. grapeseed, rice bran, sunflower)
Finishing touches
a 7” cardboard round
12 whole hazelnuts, peeled and toasted
½ cup (50g) peeled and finely chopped hazelnuts
Directions for the sponge layers:
NB. The sponge layers can be prepared in advance and stored interleaved with parchment and well-wrapped in the fridge overnight.
1.Position the racks in the top and centre thirds of the oven and heat to 400F (200C).2.Cut six pieces of parchment paper to fit the baking sheets. Using the bottom of a 9" (23cm) springform tin as a template and a dark pencil or a pen, trace a circle on each of the papers, and turn them over (the circle should be visible from the other side, so that the graphite or ink doesn't touch the cake batter.)3.Beat the egg yolks, 2/3 cup (81g) of the confectioner's (icing) sugar, and the vanilla in a medium bowl with a mixer on high speed until the mixture is thick, pale yellow and forms a thick ribbon when the beaters are lifted a few inches above the batter, about 3 minutes. (You can do this step with a balloon whisk if you don't have a mixer

4.In another bowl, using clean beaters, beat the egg whites until soft peaks form. Gradually beat in the remaining 2/3 cup (81g) of confectioner's (icing)sugar until the whites form stiff, shiny peaks. Using a large rubber spatula, stir about 1/4 of the beaten whites into the egg yolk mixture, then fold in the remainder, leaving a few wisps of white visible. Combine the flour and salt. Sift half the flour over the eggs, and fold in; repeat with the remaining flour.5.Line one of the baking sheets with a circle-marked paper. Using a small offset spatula, spread about 3/4cup of the batter in an even layer, filling in the traced circle on one baking sheet. Bake on the top rack for 5 minutes, until the cake springs back when pressed gently in the centre and the edges are lightly browned. While this cake bakes, repeat the process on the other baking sheet, placing it on the centre rack. When the first cake is done, move the second cake to the top rack. Invert the first cake onto a flat surface and carefully peel off the paper. Slide the cake layer back onto the paper and let stand until cool. Rinse the baking sheet under cold running water to cool, and dry it before lining with another parchment. Continue with the remaining papers and batter to make a total of six layers. Completely cool the layers. Using an 8" springform pan bottom or plate as a template, trim each cake layer into a neat round. (A small serrated knife is best for this task.)

Directions for the chocolate buttercream:
NB. This can be prepared in advance and kept chilled until required.
1.Prepare a double-boiler: quarter-fill a large saucepan with water and bring it to a boil.2.Meanwhile, whisk the eggs with the sugar until pale and thickened, about five minutes. You can use a balloon whisk or electric hand mixer for this.3.Fit bowl over the boiling water in the saucepan (water should not touch bowl) and lower the heat to a brisk simmer. Cook the egg mixture, whisking constantly, for 2-3 minutes until you see it starting to thicken a bit. Whisk in the finely chopped chocolate and cook, stirring, for a further 2-3 minutes.4.Scrape the chocolate mixture into a medium bowl and leave to cool to room temperature. It should be quite thick and sticky in consistency.5.When cool, beat in the soft butter, a small piece (about 2 tablespoons/30g) at a time. An electric hand mixer is great here, but it is possible to beat the butter in with a spatula if it is soft enough. You should end up with a thick, velvety chocolate buttercream. Chill while you make the caramel topping.
Lorraine's note: If you're in Winter just now your butter might not soften enough at room temperature, which leads to lumps forming in the buttercream. Male sure the butter is of a very soft texture I.e. running a knife through it will provide little resistance, before you try to beat it into the chocolate mixture. Also, if you beat the butter in while the chocolate mixture is hot you'll end up with more of a ganache than a buttercream!
Directions for the caramel topping:
1.Choose the best-looking cake layer for the caramel top. To make the caramel topping: Line a jellyroll pan with parchment paper and butter the paper. Place the reserved cake layer on the paper. Score the cake into 12 equal wedges. Lightly oil a thin, sharp knife and an offset metal spatula.2.Stir the sugar, water and lemon juice in a small saucepan. Bring to a boil over a medium heat, stirring often to dissolve the sugar. Once dissolved into a smooth syrup, turn the heat up to high and boil without stirring, swirling the pan by the handle occasionally and washing down any sugar crystals on the sides of the pan with a wet brush until the syrup has turned into an amber-coloured caramel.3.The top layer is perhaps the hardest part of the whole cake so make sure you have a oiled, hot offset spatula ready. I also find it helps if the cake layer hasn't just been taken out of the refrigerator. I made mine ahead of time and the cake layer was cold and the toffee set very, very quickly—too quickly for me to spread it. Immediately pour all of the hot caramel over the cake layer. You will have some leftover most probably but more is better than less and you can always make nice toffee pattern using the extra to decorate. Using the offset spatula, quickly spread the caramel evenly to the edge of the cake layer. Let cool until beginning to set, about 30 seconds. Using the tip of the hot oiled knife (keep re-oiling this with a pastry brush between cutting), cut through the scored marks to divide the caramel layer into 12 equal wedges. Cool another minute or so, then use the edge of the knife to completely cut and separate the wedges using one firm slice movement (rather than rocking back and forth which may produce toffee strands). Cool completely.
Angela's note: I recommend cutting, rather than scoring, the cake layer into wedges before covering in caramel (reform them into a round). If you have an 8” silicon round form, then I highly recommend placing the wedges in that for easy removal later and it also ensures that the caramel stays on the cake layer. Once set, use a very sharp knife to separate the wedges.
Assembling the Dobos
1.Divide the buttercream into six equal parts.2.Place a dab of chocolate buttercream on the middle of a 7 1/2” cardboard round and top with one cake layer. Spread the layer with one part of the chocolate icing. Repeat with 4 more cake layers. Spread the remaining icing on the sides of the cake.3.Optional: press the finely chopped hazelnuts onto the sides of the cake.4.Propping a hazelnut under each wedge so that it sits at an angle, arrange the wedges on top of the cake in a spoke pattern. If you have any leftover buttercream, you can pipe rosettes under each hazelnut or a large rosette in the centre of the cake. Refrigerate the cake under a cake dome until the icing is set, about 2 hours. Let slices come to room temperature for the best possible flavour.

Waiting for september DB challenge !!


Tuesday, 18 August 2009

OUT OF SERVICE
OUT OF SERVICE
OUT OF SERVICE

You may also like

Related Posts with Thumbnails
Custom Search